Embedding Power Apps (Canvas, Model-Driven) may be a scenario you might have to deal with when you want your customer to access a Power App through a dedicated Power Apps Portal designed for your customer’s specific needs. Unfortunately, there isn’t a native way of integrating your Power App into the Power Apps Portal. Therefore, a workaround has to be used in order to achieve the goal.
Situation
It’s a well-known fact that embedding Power Apps into other applications like Microsoft Teams, Power BI Dashboards and Model-Driven Power Apps works easily and with native implementation methods. However, that isn’t the case when we’re talking about Power Apps Portals.
For the following instructions, please keep in mind that every user still needs a proper Power Apps license (Per App Plan, Per User Plan) in order to run the Power Apps within the Portal.
Embed Power Apps
#1 Creating a Power Apps
First step is, of course, creating a Power Apps. For this example, I created a small app for registering for a newsletter (may be a better use case for Microsoft Forms though).
Please note that this tutorial works for both Canvas Apps and Model-Driven Apps!

So far, so good. Let’s move on.
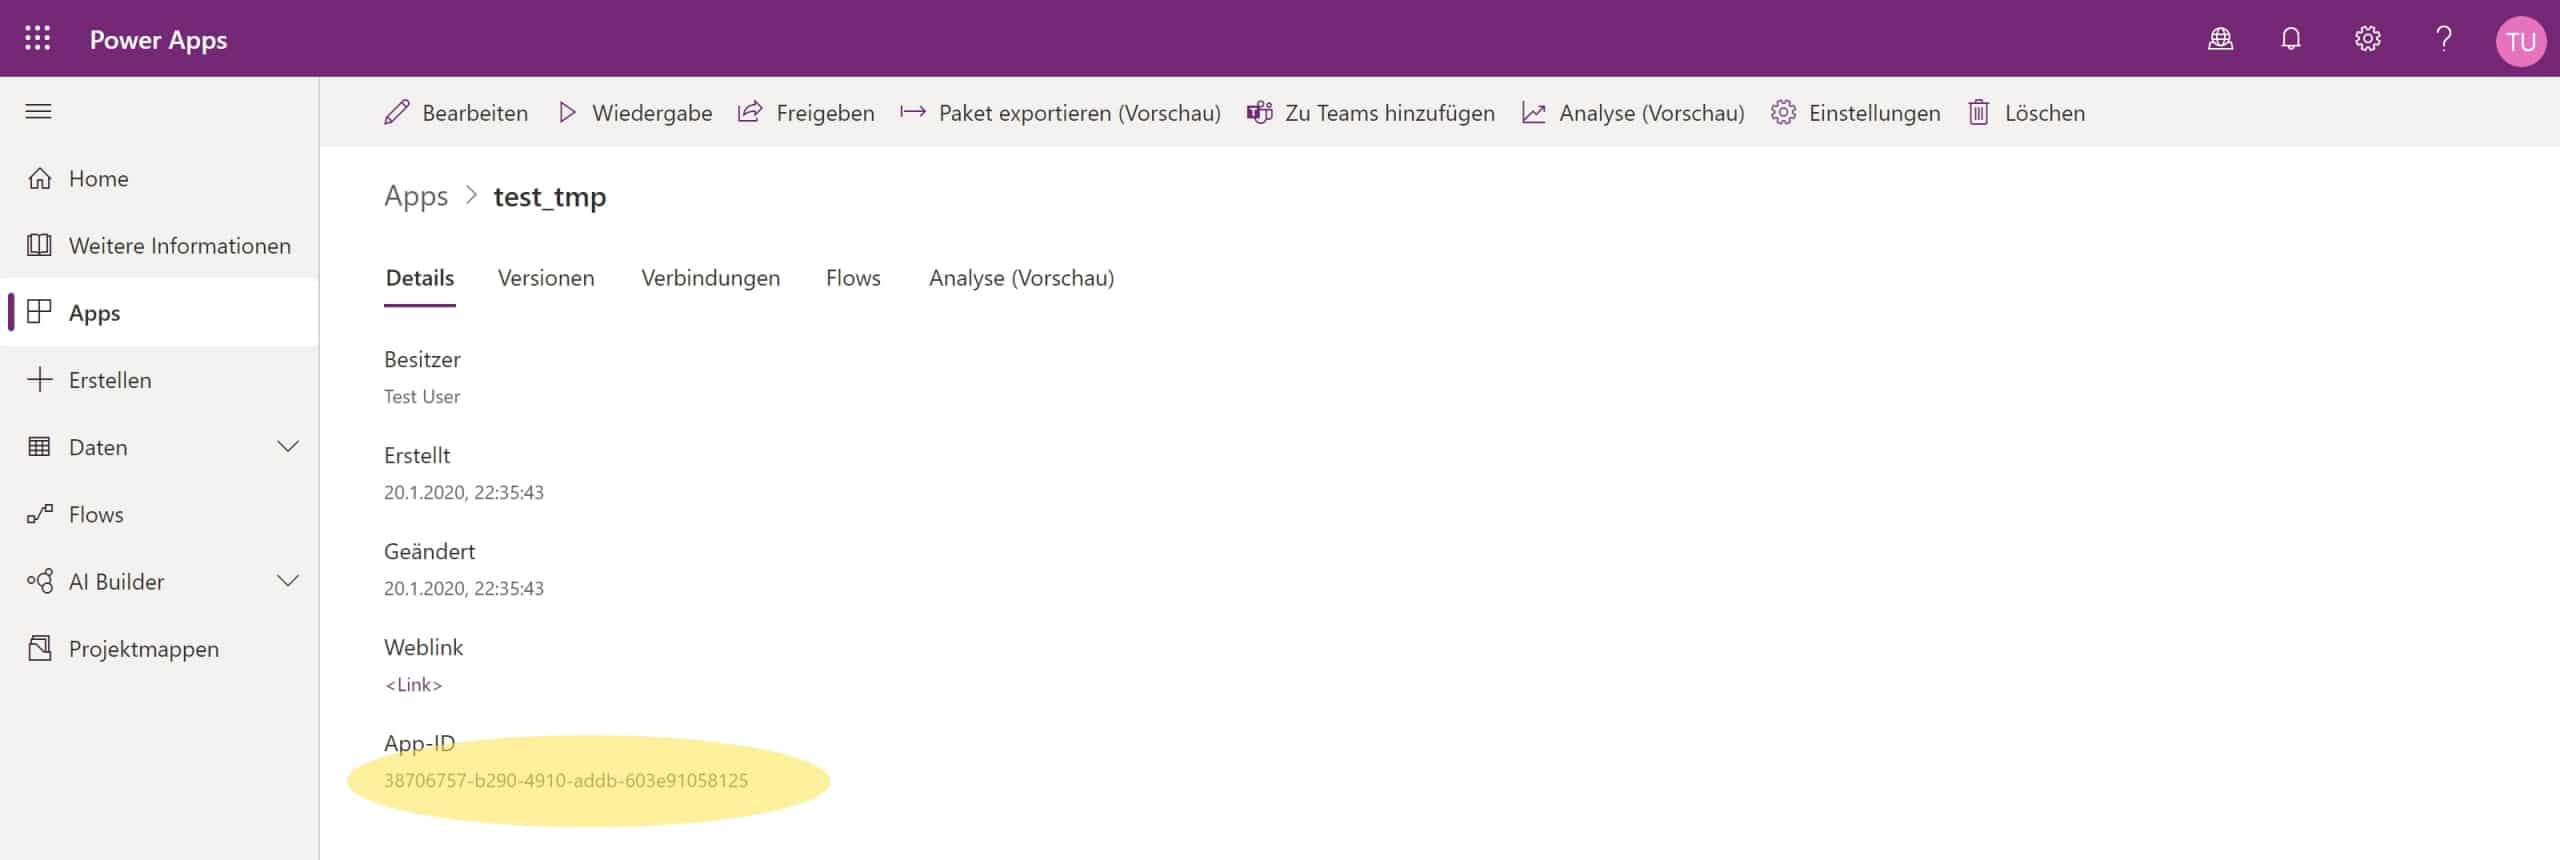
#2 App ID
The next step is to identify the App ID of your Power App. Make sure you’ve saved and published your Power App.
Then, navigate to the settings of the specific Power App and copy the App ID:
#3 Creating Embedding Code
Here’s the HTML source code for embedding a Power App as an iFrame:
<iframe width="<W>" height="<H>" src="https://apps.powerapps.com/play/<AppID>?source=website&screenColor=rgba(165,34,55,1)" allow="geolocation; microphone; camera"/>There are three parts to replace within the code snippet:
- First, replace <AppID> with the App ID from the settings of your application.
- Replace <W> with the desired width (pixels, percentage) of your Power App. This may also be 100% for maximum width.
- Also replace <H> with the desired height (pixels, percentage) of your Power App. This may also be 100% for maximum height.
#4 Creating a Power Apps Portal
For now, we’ve done everything related to the Power App itself. Now it’s time to move on to your Power Apps Portal. Assuming that you’ve already created a new Power Apps Portal, you should now create a new page:
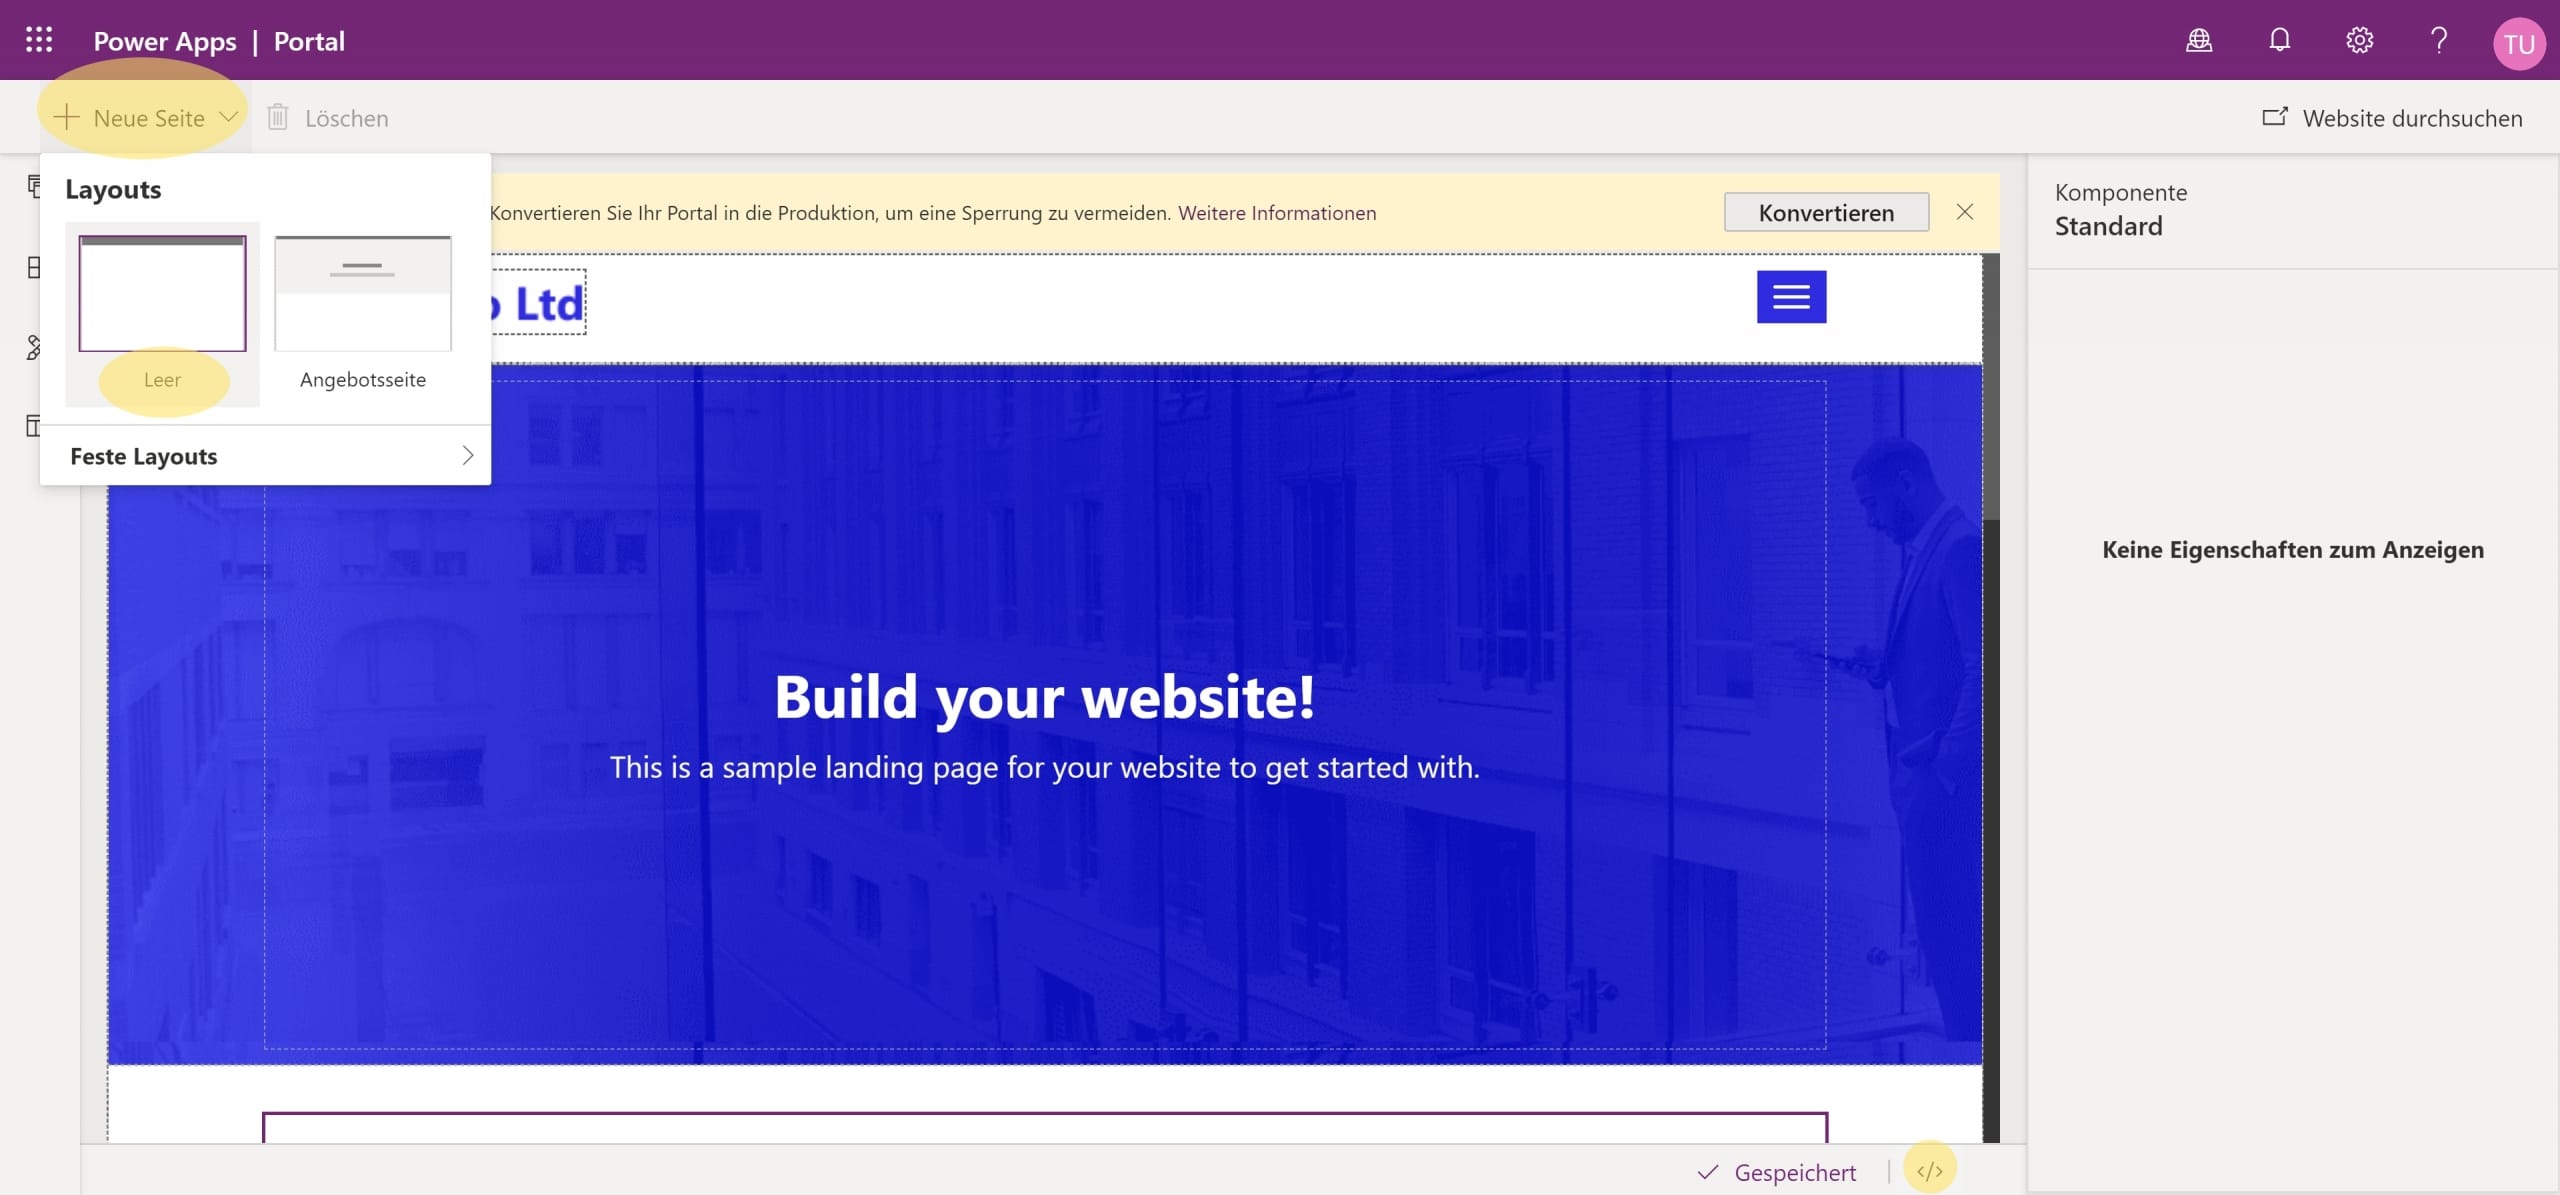
#5 Embedding the Power App
As the next step, select the body of the newly created page. Then, click on the Source Code Editor button </> on the bottom right corner.
Within the Source Code Editor, paste the custom code snipped from above with the replaced values. The Power App will appear then.
By clicking on the Browser website button, you can experience the fully working Power App within the frame of the Power Apps Portal. Enjoy!
#6 Responsiveness
When you’re about to embed a Model-Driven Power App, you won’t run into issues with scaling and responsiveness. However, creating responsive Canvas Apps is a bit of work here and there and should be taken care of before moving to production state.
In order to also achieve responsiveness for the Canvas Apps, have a look at my dedicated blog article:
One last thing
Asides from licensing topics, there are a few more key points:
- The security of Power Apps Portals is based on entity permissions (entity „contacts“). However, that doesn’t change the fact that the embedded Power App displays any data which you allow it to show within the app.
- The embedded Power App can’t directly interact with the Power App Portal (e.g. entity lists, entity forms or Liquid) as it’s a completely separate app.
- As the Power App is embedded through an iFrame, it won’t have the same responsiveness as the Power Apps Portal.
Schreibe einen Kommentar