Would you like to grow your own microgreens at home? This article explains how to grow these small, extremely healthy plants with lots of vitamins in eight steps. It also includes insider knowledge on how to promote the perfect growth of these little green plants. Towards the end of the article, you will find important tips and tricks - paired with great photos of my experiences so far.
Cultivation of microgreens
This article deals with the Growing microgreens professionally and at home on your windowsill in eight simple steps can. Before we get to the instructions, I would like to give you a few Cultivation basics with you:
You can use microgreens Grow in different trays and containers. You can use free plastic trays for vegetables such as tomatoes or champions or use professional trays. In this article, I will show you how to grow microgreens while using Trays in 1020 size (10″ × 20″, i.e. 25.4cm × 50.8cm). These have the Perfect size for the windowsill.
To ensure that your microgreens grow perfectly in the trays, I use Three trays for growing microgreensAn unperforated tray forms the bottom tray. I place a perforated tray in or on top of this, in which the microgreens are placed on the growing medium (e.g. Coconut soil) grow up. The perforated tray allows too much water to run off or the microgreens can absorb water (more on this later). The third tray is an unperforated tray, which we use for a even better germination and a strong growth process use. Read more in the instructions.
If you want to grow your microgreens completely without plastic, I recommend you take a look at the Grow-Grow Nut.
Instructions
1. preparations
So that you can Start growing microgreens successfullyyou need to consider four things:
- Soften your Seeds - depending on the type - if necessary, so that it germinates better. Peas for example, should be soaked, whereas Broccoli does not need to be soaked.
- Hold three per cultivation Trays (1× perforated, 2× unperforated) so that the attachment works perfectly.
- Have your growing medium such as Coconut soil or Cultivation soil at hand.
- Fill a Pressure sprayer with water that is as pH-neutral as possible.
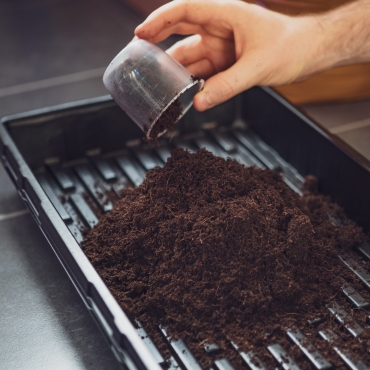
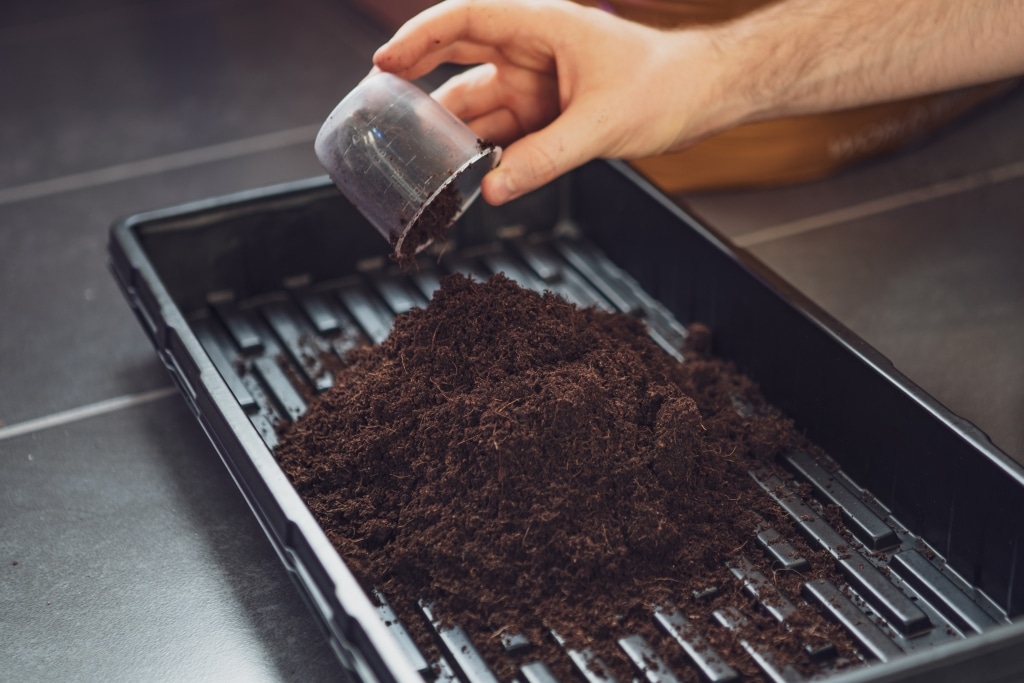
2. preparation of the medium
Place the perforated tray in one of the unperforated trays (water drainage and feed possible). Fill one approx. two to three centimeters high layer of Coconut soil or Cultivation soil into your perforated tray.
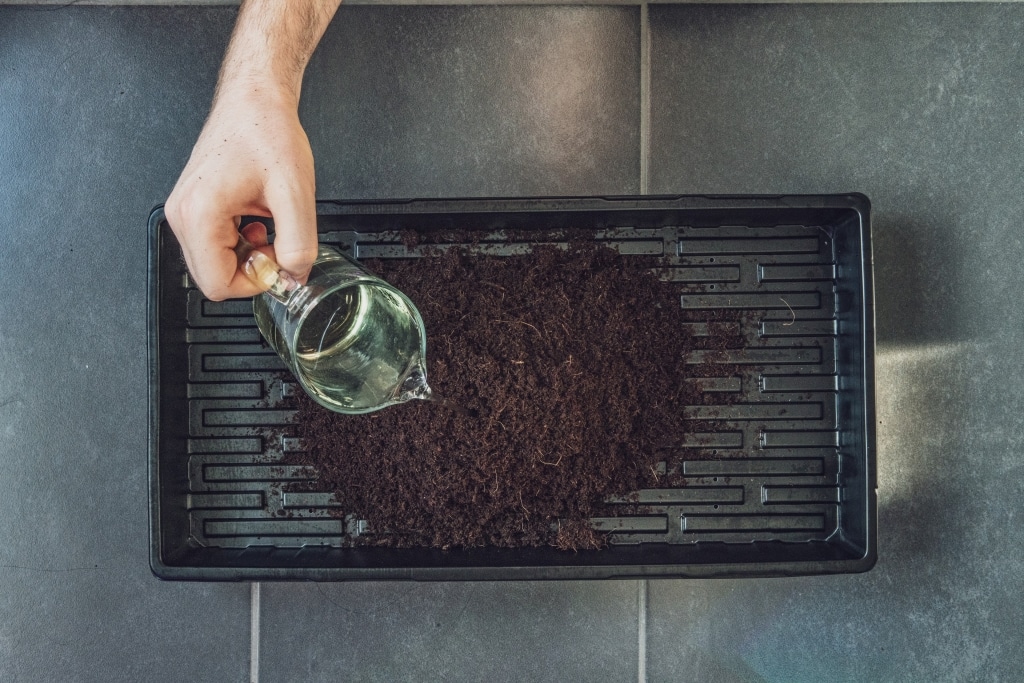
Moisten the coco soil with as much pH-neutral water. About pH stabilizers you can regulate your water.
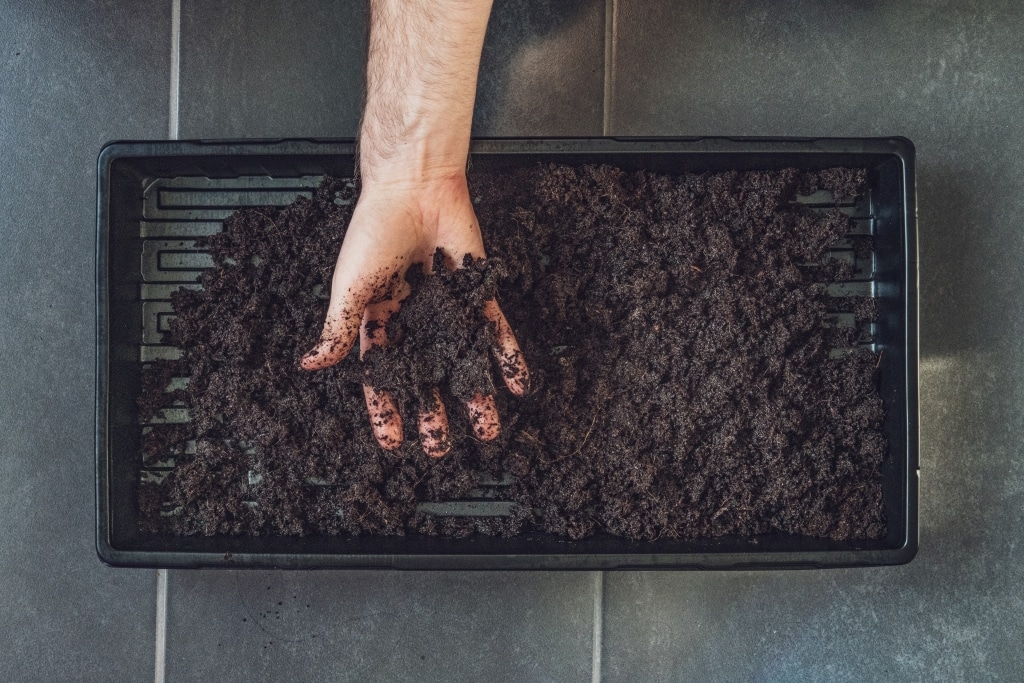
Make sure that the coco soil is distributed evenly so that the microgreens grow evenly and uniformly.
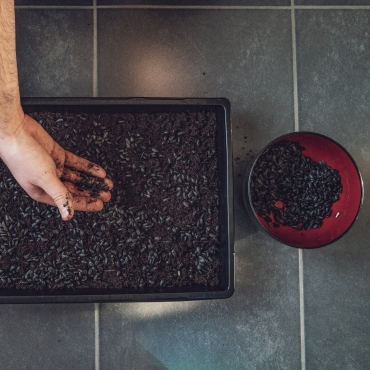
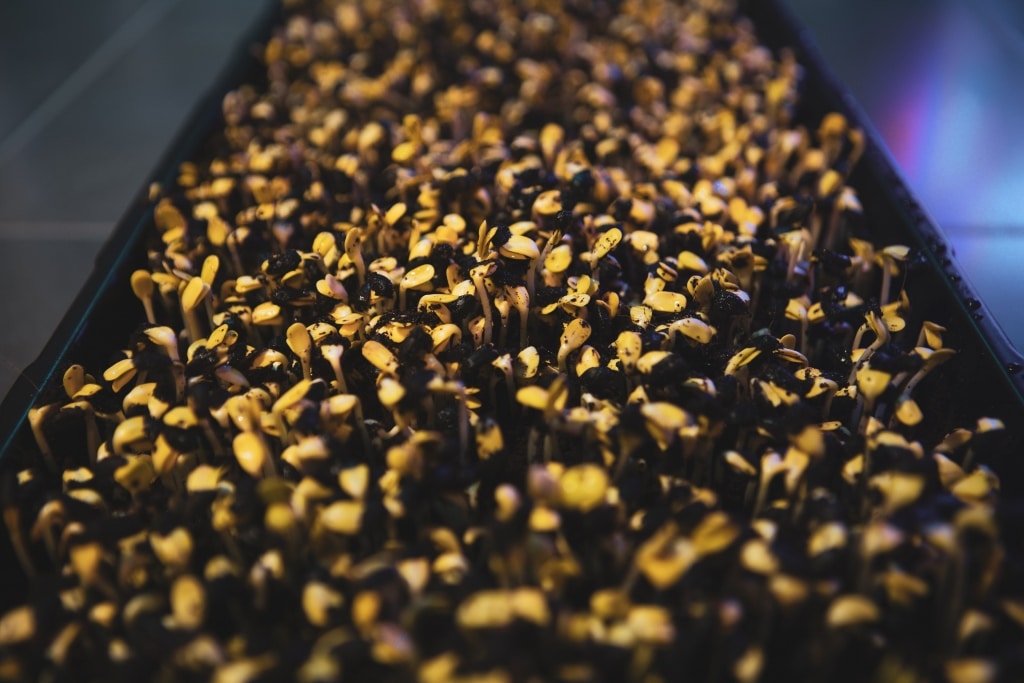
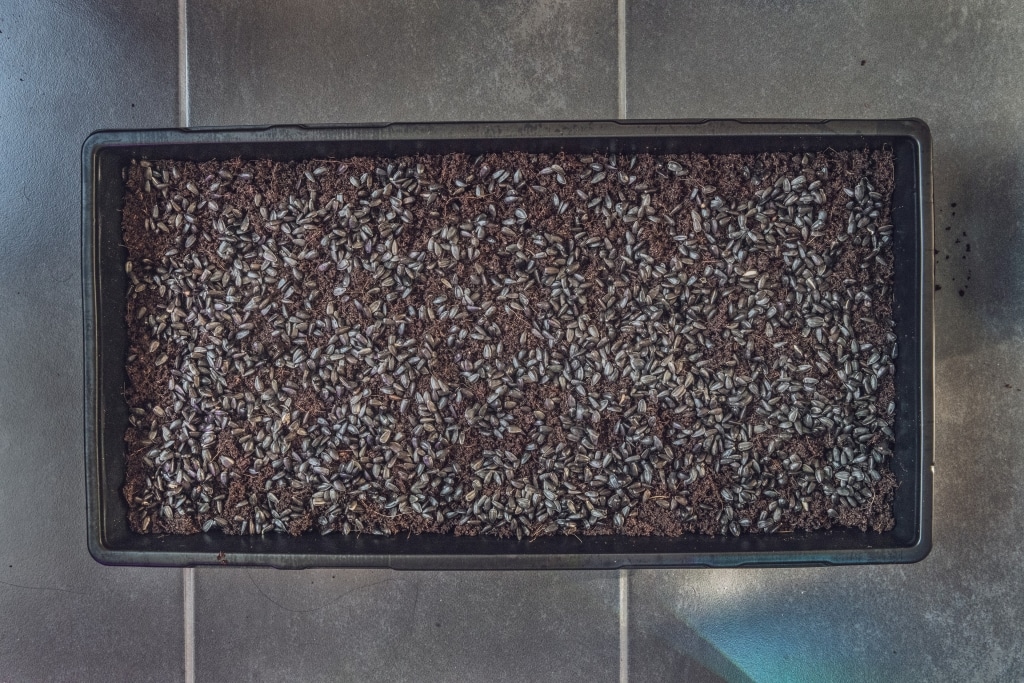
3. distributing the seed
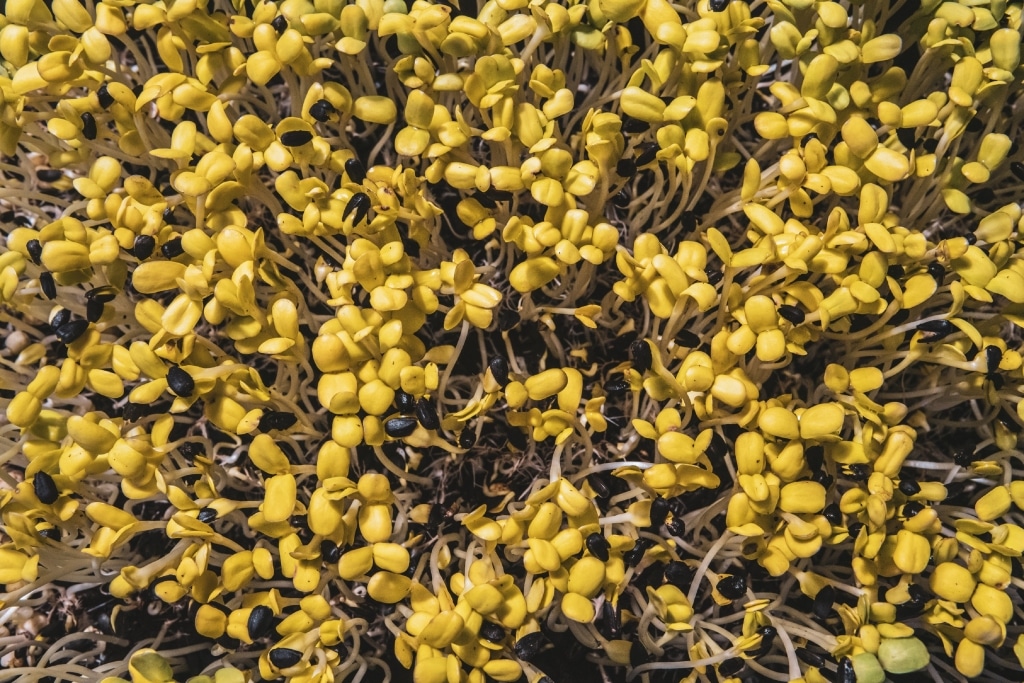
After successful preparations, you can now move on to the Microgreens evenly on the Coconut soil to distribute. Depending on the microgreens, you should use between 15 and 25 grams per 1020 tray.
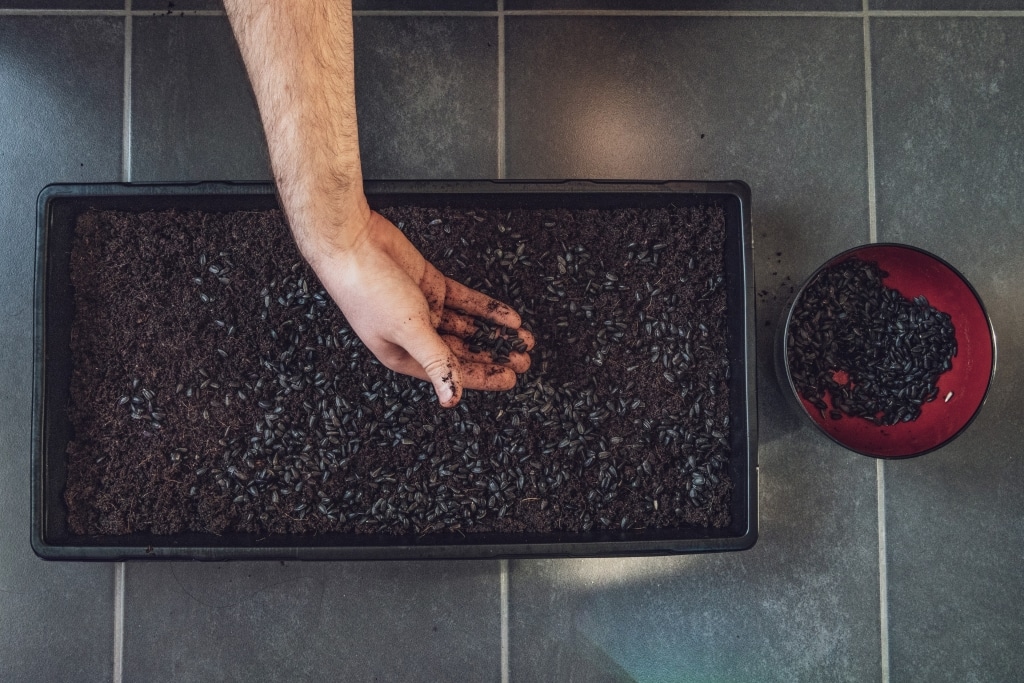
After distributing, you can use the Press the seed a little into the growing medium by handto establish permanent contact with the moisture.
Then use the Pressure sprayer with water that is as pH-neutral as possible and spray all the seeds.
As a final step, take your third 1020 tray (without holes) and place it on the seed or growing medium. At best, place something heavy on top so that the roots of the seeds dig into the soil and remain in contact with the moist coconut soil.
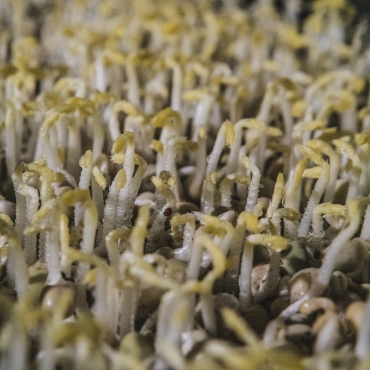
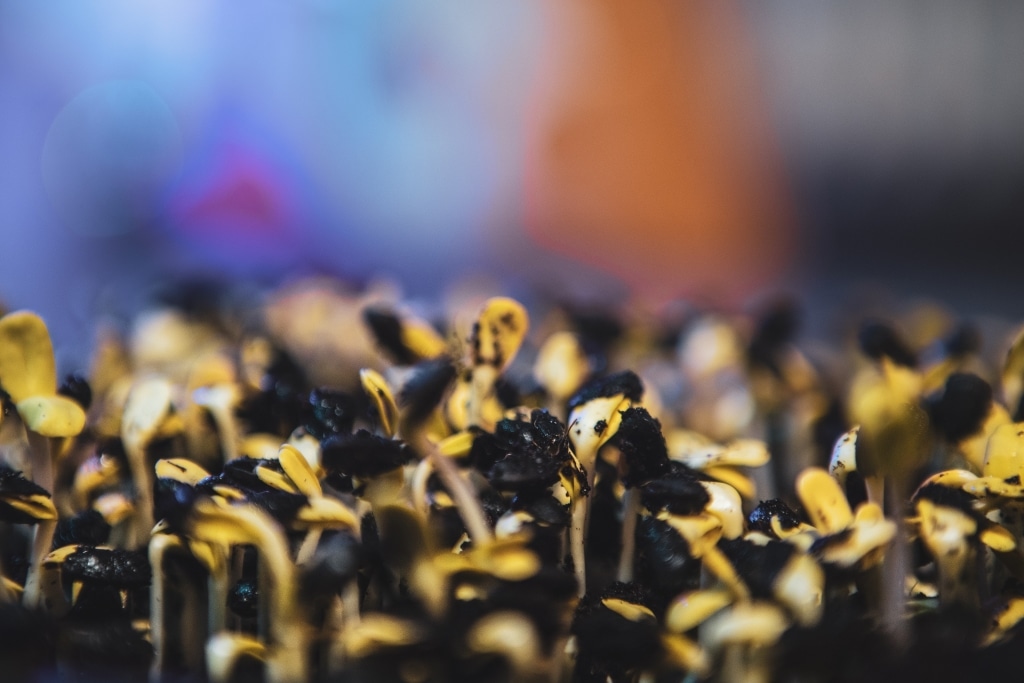
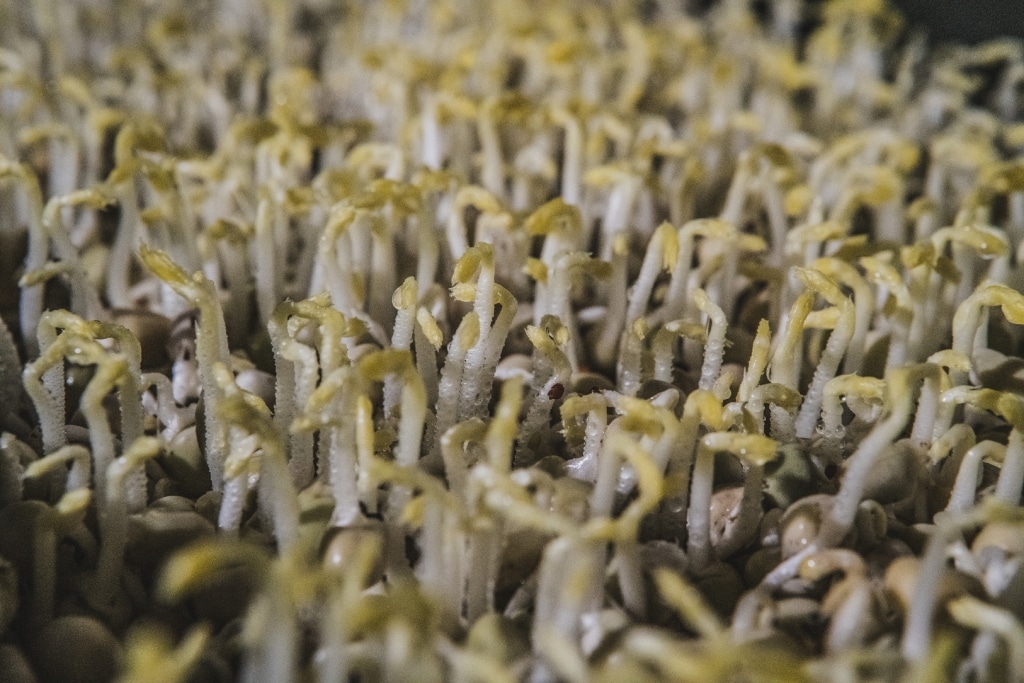
4th germination phase
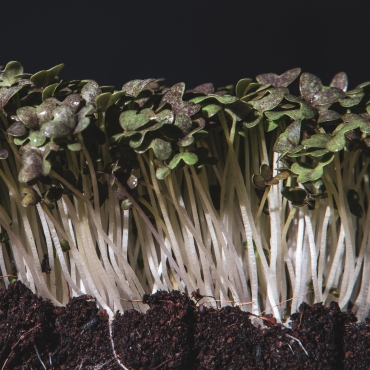
Now spray the seeds two to three times a day and leave the tray on them for the rest of the time so that there is no contact with the light.
Continue this process until all the seeds have germinated, already have their first leaves and have grown one to two centimetres. Experience has shown that this takes between three and seven days, depending on the seed.
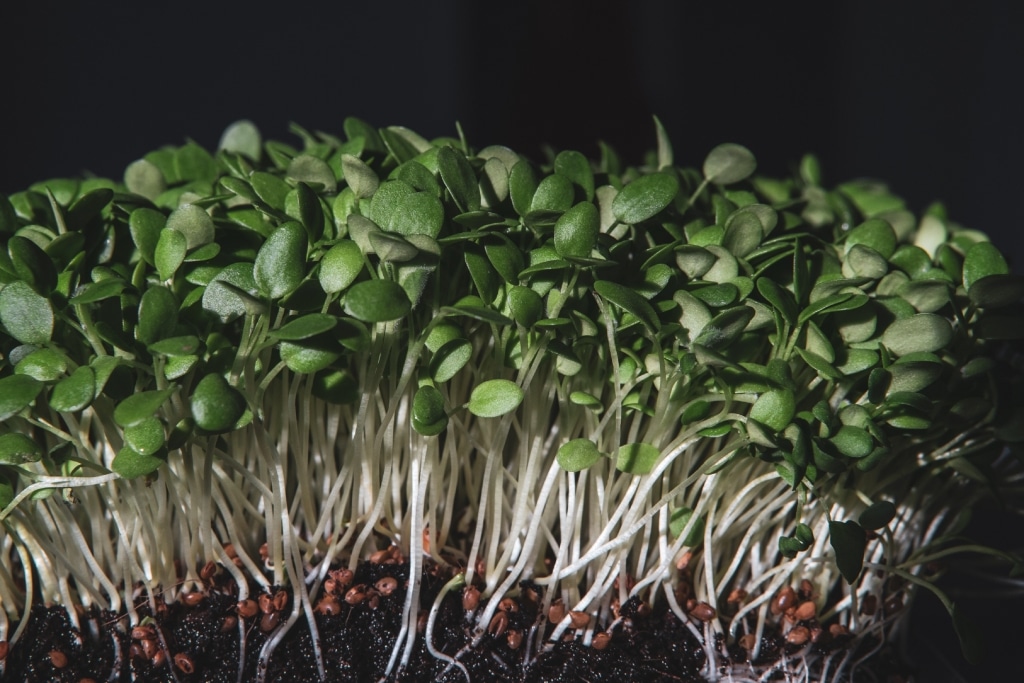
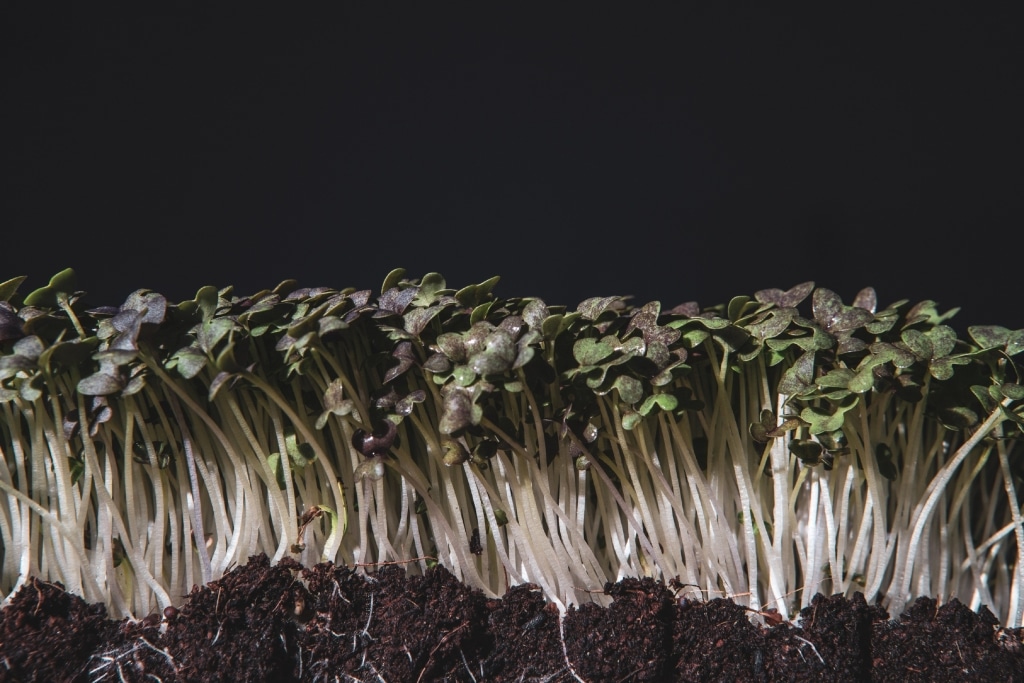
5th blackout phase
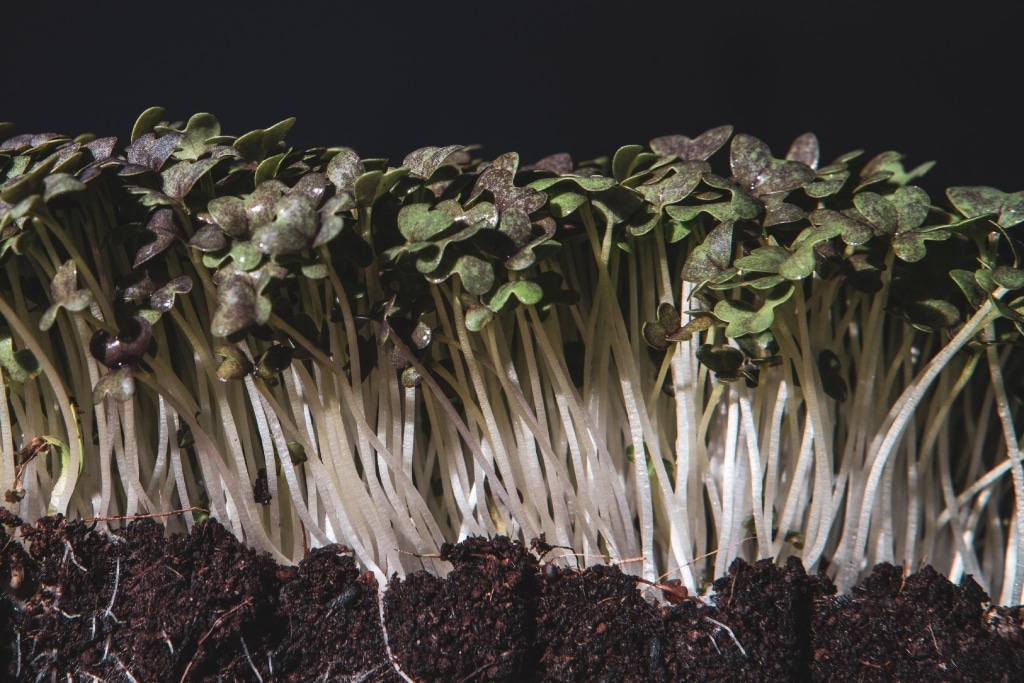
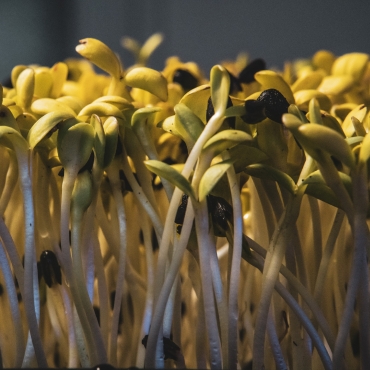
As soon as all the microgreens have germinated and have their first leaves, the blackout phase begins. In addition turn the upper tray over so that no more pressure is exerted on the microgreens. At the same time, the microgreens continue to grow in the dark. The reason for this is that it allows us to increase the yield: The Microgreens stretch by searching for light and thus grow strongly in length.
How long the blackout phase lasts depends on your preference. Do you want the Harvest microgreens quicklyyou can use the Shorten the blackout phase. For a high yield extend you the Blackout phase.
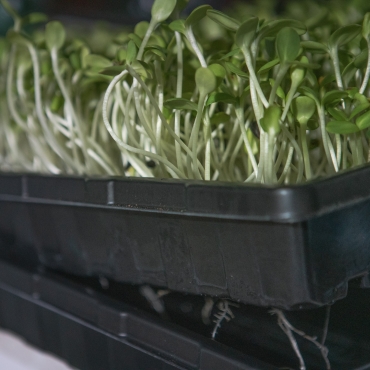
6. irrigation and nutrients
As soon as the first roots grow through the perforated tray, we also change our watering method.. Previously, we watered the microgreens using a pressure sprayer and pH-neutral water. From now on, we will only water the microgreens using add 200 to 500 milliliters of pH-neutral water to the bottom, unperforated tray two to three times a day. This has two advantages:
- The water goes directly to the roots of the microgreens, where they can absorb it perfectly.
- The surface of the Coconut soil is not so damp, so that mold is effectively avoided and insects such as fungus gnats do not feel at home.
Would you like to Nutrients so that the microgreens grow even more extensively? Now is the time: You can use the Simply add nutrients to the water in the dose recommended by the manufacturer. I personally have worked with General Hydroponics MaxiGro has had good experiences - especially as it stabilizes the pH value.
7. maturity phase
Have you decided that your microgreens have grown high enough? Then let's move on to the ripening phase. In this phase, it is particularly important that your microgreens Lots of light get. Place them on the windowsill or illuminate them with special plant lights.

8. harvest time
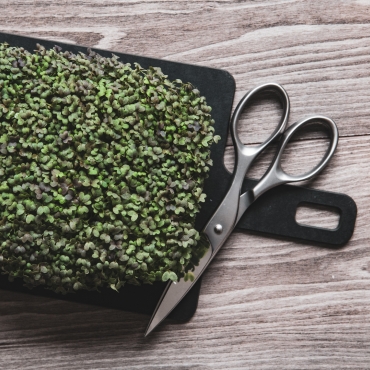
Do your microgreens look fully grown? Are all the leaves green and no longer yellow? Then you have arrived at harvest time and You are about to be able to enjoy your microgreens!
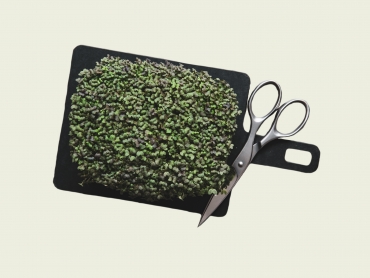
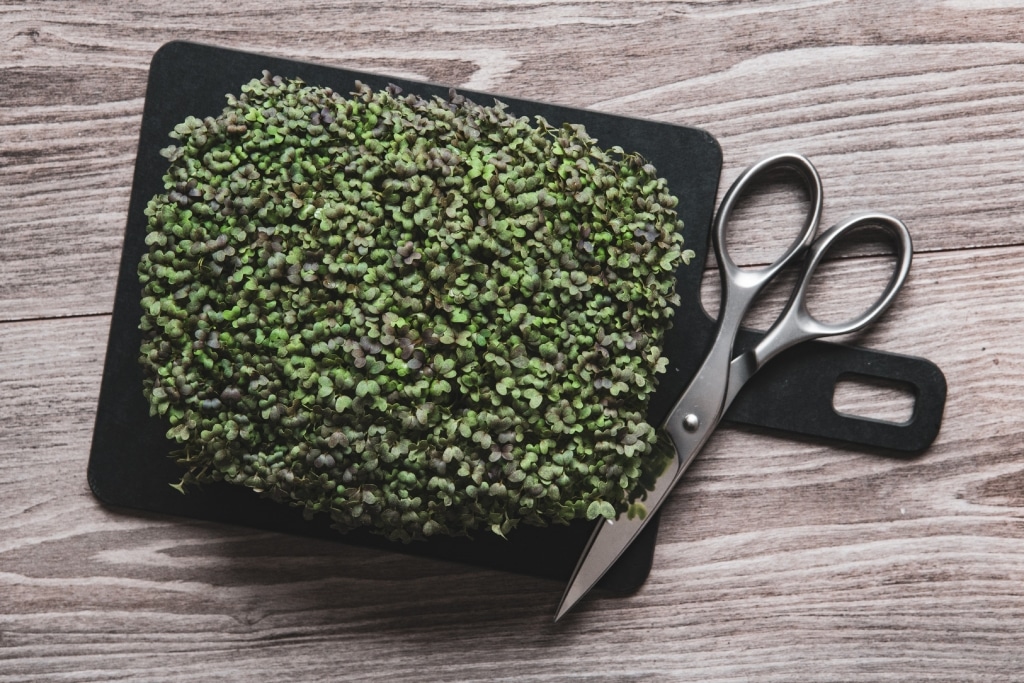
For harvesting the microgreens I recommend a Scissors or a long knife with smooth blade (without serrations). This is the best way to separate the microgreens. Enjoy your meal!
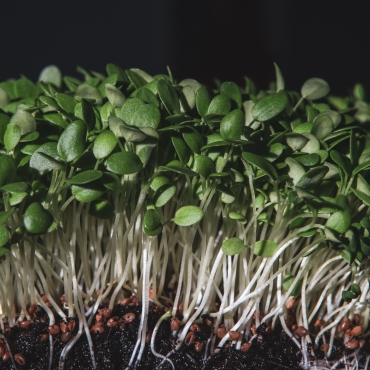
The Coconut soil is generally not reusableas it is overgrown with the roots of your microgreens. Tip: It's worth taking a look under the coco soil to see the root structure.
The best microgreens
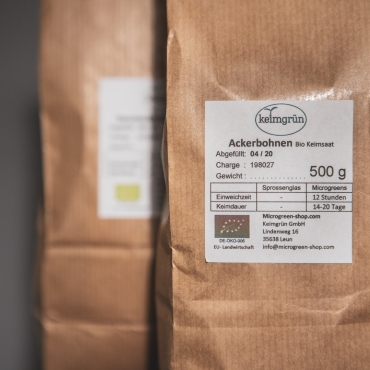
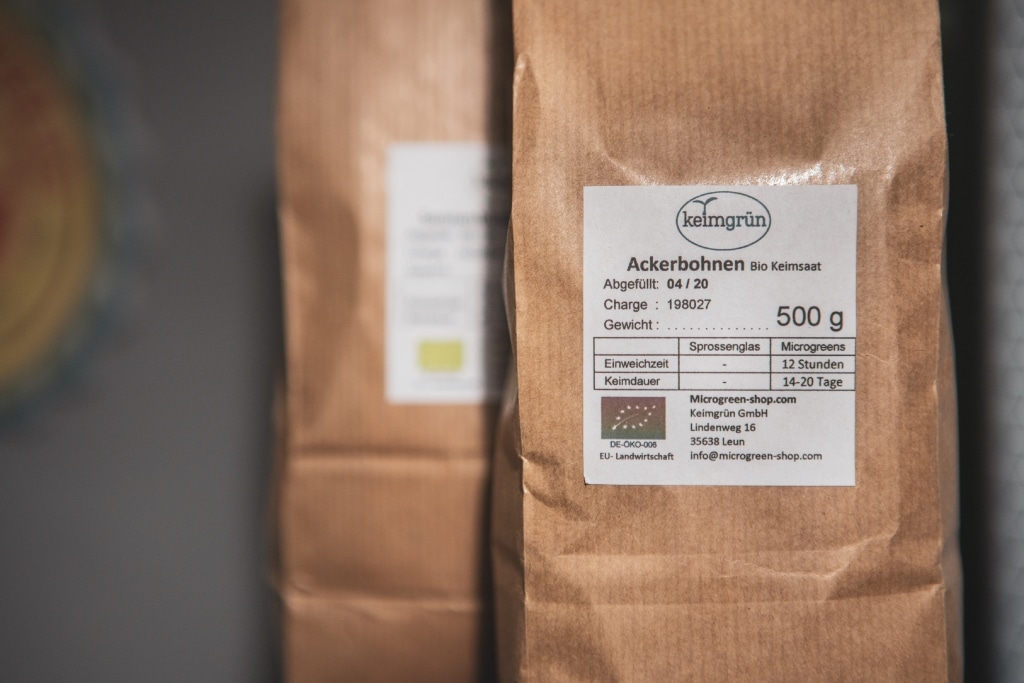
There are a number of places to buy microgreens and sprouts. Me recommend from personal experience the Microgreen-Shopwhich offers a wide selection of high-quality sprouts and microgreens. All seeds are tested by an independent laboratory for perfect Quality tested. At the same time, the business sells no cultivated varietieswhich may look better as mature plants. In fact, uncultivated varieties are generally much better in terms of ingredient and vitamin content.
But what is actually the Difference between microgreens and sprouts? Both variants are one and the same plantonly that Harvest age is different. Sprouts have an age of approx. 3-8 days and microgreens of approx. 8-20 days. Of course, it is not possible to determine the exact age to the day, but it can be said to be roughly the same. You can find more details on this here.
My absolute Microgreen favorites I have listed and photographed them below:
Broccoli
Broccoli is known as particularly healthy vegetables which acts as an immune booster. The spicy-piquant The taste is slightly reminiscent of Chinese cabbage. I particularly like to eat broccoli on bread as an addition to spreads. But broccoli is also a wonderful addition to salads. Broccoli can also be used to make super tasty Microgreens pesto make!
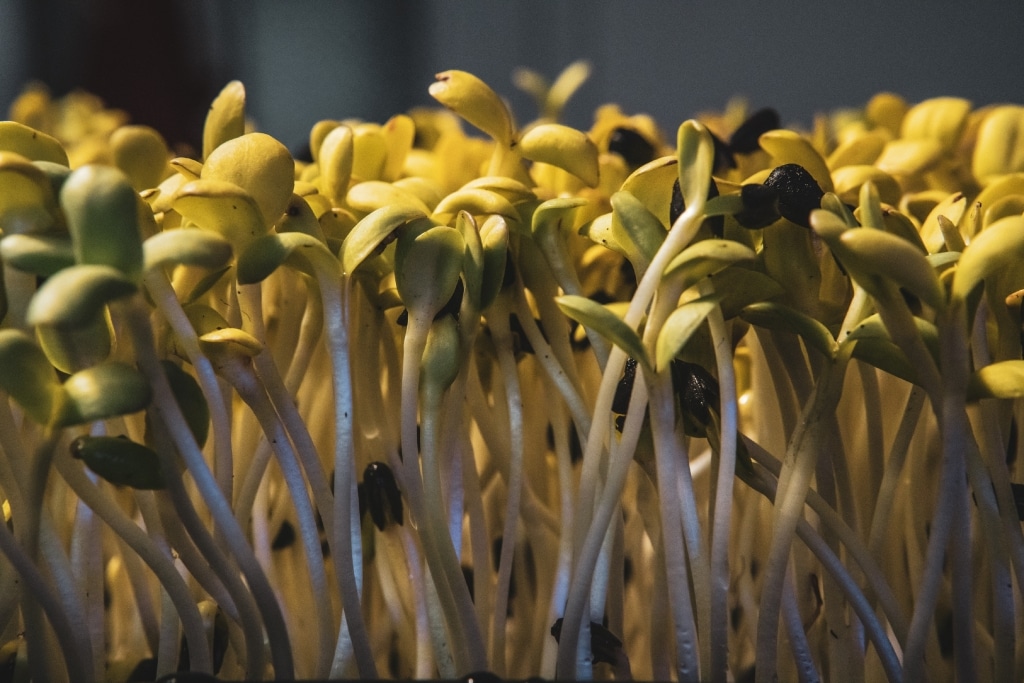
Sunflowers
Sunflowers are less sharp than mizuna and broccoli and taste Slightly sweet, fresh and crunchy. They grow very tall if you follow a few tips, so a grow groove with sunflowers is a good basis for a salad. The seed coat can be removed by shaking if it has not already fallen off by itself.
Red clover
Red clover is a microgreen variety that not sharp and is great as a salad or on bread can be used. Due to the mild, slightly nutty taste the fresh and beautifully delicate green of red clover is suitable Perfect for getting started in the world of microgreens.
Mizuna
Mizuna has a delicate cabbage flavor and is Slightly spicy. The fine microgreens can be used perfectly as a decoration or as a side dish to a salad. I particularly like to use them in burgers as a supplement or alternative to a regular salad.
Tips and tricks
Although microgreens are comparatively easy to grow, many factors play a role: temperature, humidity, air purity and irrigation are just a few examples. Should you ever get stuck or Cultivation challenges then pull out my List with many solution tips:
- Do you think Mold have discovered? First check that it is not root hairs. These can look very similar to mold. If the mold is confirmed, you can remove it by adding a 3%igen hydrogen peroxide solution into the pH-neutral water in your Pressure sprayer combat. To do this, you add five to ten milliliters per liter of water to.
- In order to avoid further illnesses, use the Irrigation methods. A Pressure sprayer helps to start with and watering from below is the correct way to end up.
- Have Fungus gnats or other insects infest your microgreens? Use Yellow sticker for effective reduction.
- To the Prevention of fungus gnats or other insects is suitable Neudosan as a natural repellent that is not harmful to humans. The use of this active ingredient also brings No waiting time until harvest but is effective and can be used in the dose indicated on the packaging. Pressure sprayer should be sprayed onto the microgreens and the growing medium.
- Due to the above described Blackout procedure your microgreens will grow significantly higher and better. At the same time, you protect them from insects for some time.
- To help your microgreens thrive even better, you can use nutrients when watering from below. There is a wide selection here. Make sure that they are compatible with your growing medium. I have used General Hydroponics MaxiGro good experiences.
- For optimum results - especially in winter - use a Special plant lampto promote growth. You only need the plant lamp in the ripening phase.
- Is there Gaps between your fully grown microgreens? Then you can probably increase the density and the amount of seed.
- If the Growth varies and are some microgreens fully grown while other microgreens are still very small? Then you have probably used too much seed.
- The YouTube channel On The Grow offers you detailed information and videos on the cultivation of different microgreens - a clear recommendation on my part.
Are you interested and want to find out more about microgreens? Then take a look at Microgreens at home to learn regular tips and tricks about growing microgreens in different containers and under different conditions.
At Microgreens at Home you can learn tips and tricks about growing microgreens.
Microgreens at home
Do you have another tip or do you have another method for growing microgreens? Then Feel free to share your experiences as a comment!
Questions & Answers
What are the best and most popular microgreens?
Basically, there are no limits. The following are particularly popular and recommended Broccoli, Sunflowers, Mizuna and Peas.
Which microgreens are particularly suitable for beginners?
Which Microgreens accessories are particularly recommended?
On the one hand, I can 1020 trays and Pressure sprayer highly recommend. You will need both for successful cultivation on your windowsill. The 1020 tray also fits perfectly on your windowsill.
How do I control fungus gnats on microgreens?
With Yellow stickers you can use against Fungus gnats and other insects how to proceed. Basically, you should place your microgreens in a well-ventilated area (after the blackout phase). I also recommend watering from below so that the surface of the substrate (e.g. Coconut soil) does not fade and "attracts" insects less strongly.
Which nutrients lead to even stronger growth?
Basically, a good substrate such as Coconut soil already contain nutrients. You can also add products such as General Hydroponics MaxiGro to stimulate growth.
On which YouTube channel can I learn a lot about microgreens?
The YouTube channel On The Grow regularly publishes high-quality videos. Here, for example, you can learn about exciting comparisons between cultivation methods and nutrients to further accelerate growth.


Leave a Reply