The connection to the Raspberry Pi with Windows 10 IoT Core is not characterized by stability in my initial tests. Disconnections and restarts were the rule. In this article, I will therefore show you a few tips, tricks and workarounds to establish a stable connection between your computer and the Raspberry Pi on a permanent basis. In particular, this article deals with problems and possible solutions if there is no connection despite a valid IP address.
Need for a connection
A connection from the notebook to the Raspberry Pi is essential in many situations:
- Configuring the device via the Device Portal
- Remote connection
- Debugging and deploying apps from Visual Studio
As already mentioned in Part 5 (installation of Windows 10 IoT Core) reports, it is recommended that a Connection via LAN and not via W-LAN to the Raspberry Pi. However, taking this advice into account, problems may still occur.
Raspberry Pi is not found
Analysis
A well-known Problem with the Windows 10 IoT Core Dashboard and Windows IoT Remote Client is that they cannot find the Raspberry Pi. Also in Visual Studio it may not be possible to establish a connection to the device. The fact is, however, that the Raspberry Pi is properly connected to the computer!
Under these circumstances, how can we establish a remote connection to the device, configure it via the Device Portal or debug an app with Visual Studio? There is no (elegant) solution to this problem. Only one workaround works reliably - the direct way via the IP address of the Raspberry Pi (unique address of the device in the network). There are two simple ways to find out the IP address in this case:
Windows IoT Core Watcher
General information
If you did not install Windows 10 IoT Core on the SD card via the Windows 10 IoT Core Dashboard but did it manually via a .iso file to be downloaded from Microsoft, the Windows IoT Core Watcher is installed under the following path:
C:\Program Files (x86)\Microsoft IoT\WindowsIoTCoreWatcher.exe
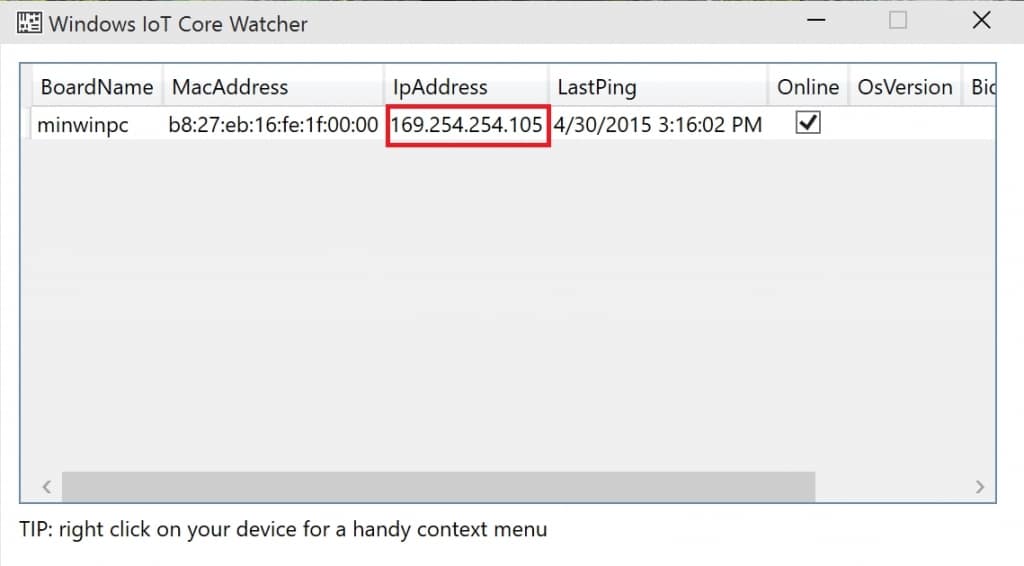
This program provides information about all "connected" devices and their IP addresses:

IoTCoreDefaultApp

Command line
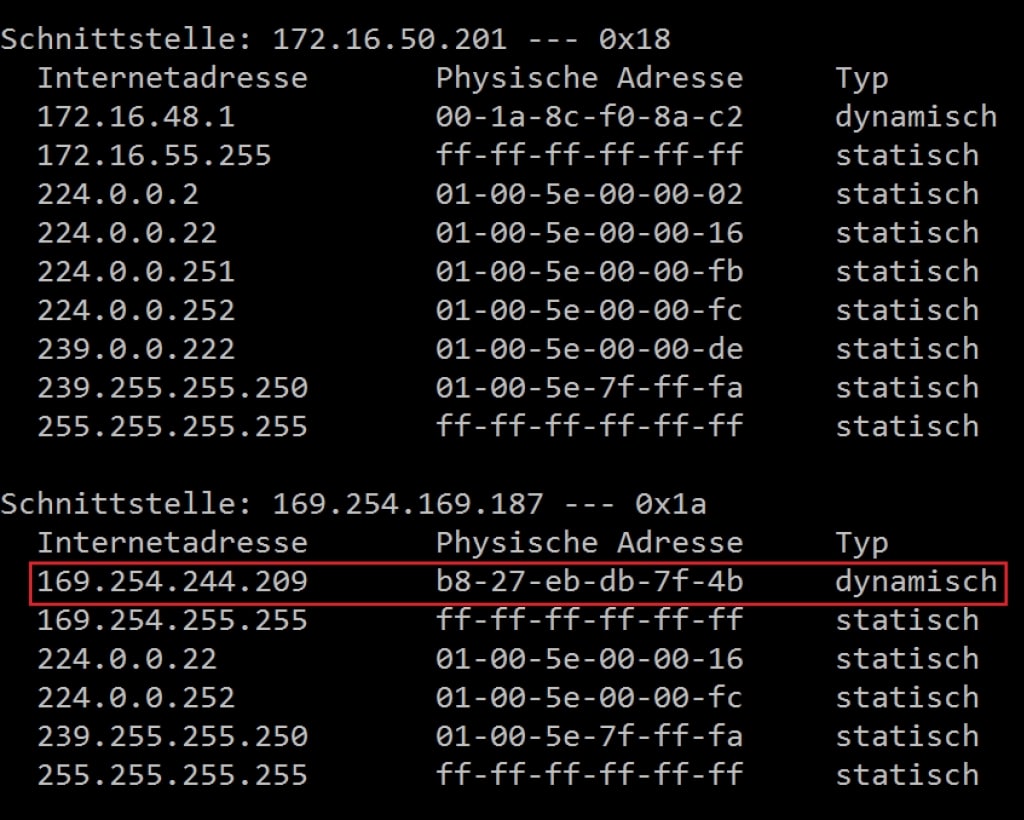
The command line can be used with the Arp command the IP address can be read out. To do this, start the command line (CMD) - for example from the Start menu - and enter the following command:
arp -a
Different IP addresses are now displayed. Similar to my screenshot, you have to fish out this IP address:

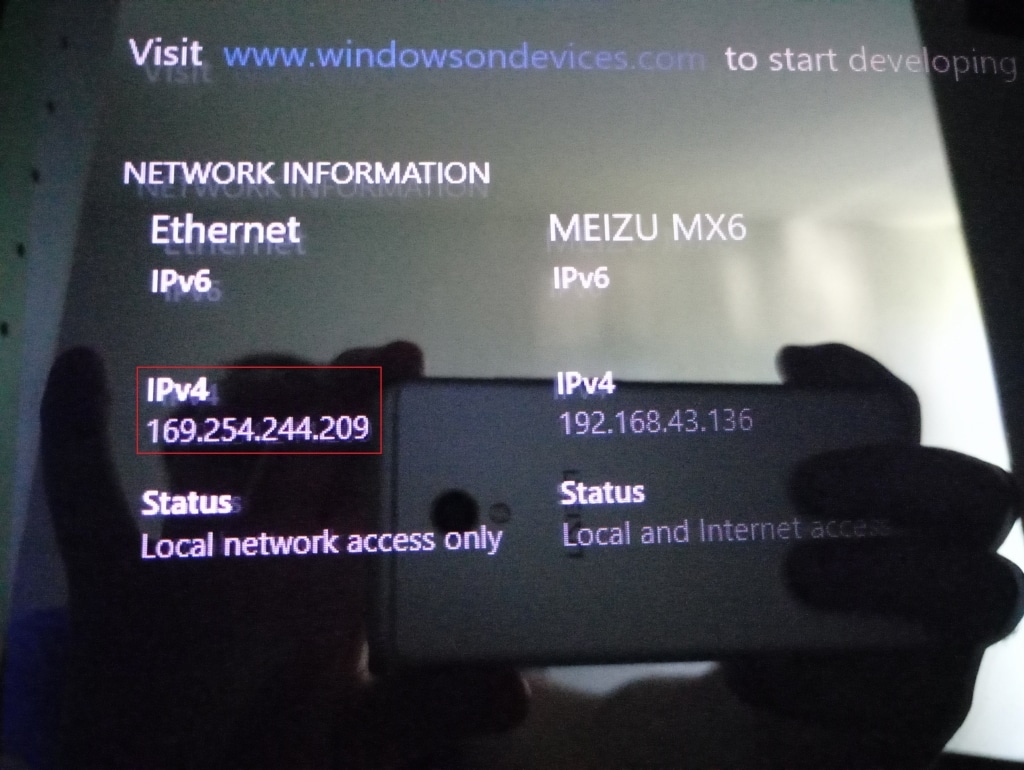
If you have already connected a monitor to your Raspberry Pi, the IoTCoreDefaultApp will start there by default. This gives you an overview of all the important information about the device, including the IP address:
Application
After finding out the IP address, it is now possible to establish the connection using this information:
- Device Portal: In the Internet browser, type http://:8080 (for example http://169.254.244.209:8080) into the address bar. In this case, 8080 is the port via which access to the device is guaranteed.
- In the Windows IoT Remote Client, you can enter the IP address manually and use it to establish the connection.
- In Visual Studio, you can store the IP address instead of the device name in the remote settings.
You can find more information here:


Leave a Reply