Do you use Outlook.com as your primary source to store your contacts? Well, it’s a good choice as it’s based on the Office 365 infrastructure. Therefore, it’s a fast, reliable and secure service from Microsoft. In this article, I’d like to show you how to create your own birthday calendar based on your Outlook.com contacts which you can share and customize as far as your creativity goes.
Reason
Microsoft’s Office 365 and Outlook automatically create birthday calendars for your contacts which are automatically populated with birthday events of your contacts. That’s a very useful feature of the offering by Microsoft which – for most of the people – is surely enough.
However, if you want to share the birthday calendar or embed it into another application, you need a link to – which is the most common way – an iCal calendar with the file extension ics. That’s already a built-in functionality for every calendar – except the auto-generated birthday calendar. This blog post and best practice shows you how to build your own birthday calendar as a new, separate calendar with all the sharing capabilities.
The specific reason for me writing this article and sharing the knowledge with you is not only my strong commitment to Microsoft technologies, but also my Magic Mirror project. I’d like to display the upcoming birthdays on the magic screen of the Magic Mirror and that’s – and here we are again – only possible with a calendar which is accessible with an ics file.
Tutorial
Preparing
For this tutorial, we use Microsoft Power Automate as a process automation engine from Microsoft in its Azure cloud. It’s a service which connects to currently more than 300 different services all across Microsoft but also many more third-party services.
In order to start, let’s prepare and see what we need:
- Birthday Calendar
a completely new created calendar on Outlook.com or Office 365 to store your birthday events - Contacts
stored on Outlook.com or Office 365 that include birth dates
The process automation within Microsoft Power Automate is called a „Flow“. That’s what stores the procedures but also the connections to the different systems involved. In our case, only Office 365 or Outlook.com will be involved with their specific functions to connect to the contacts and calendars.
As the amount of contacts vary quite a lot from people to people, I decided to create two Flows to cover both actions which need to be taken care of:
- The first Flow takes care of removing all birthday events which are stored in your specific, newly created birthday calendar.
- The second Flow loops through your contacts and creates birthday events for each of them if the birth date is valid and filled.
By default (my configuration), the first Flow starts on Sunday at 02:00 AM and the second Flow starts on Sunday at 03:00 AM. Therefore, changes may take up to a week to sync with your calendar. Feel free to chance these settings that act as a trigger to start the Flows.
I have created two packages for Microsoft Power Automate which you need to import into your Microsoft Power Automate environment following these steps:
Import an existing Flow in Power Automate
There are a few steps to follow when importing an existing flow:
- You start with a click on the Import button in the top menu bar of the screen.
- Upload the package with the flow provided on my website. Wait for the screen to show up package details.
- When configuring the flow settings, you can choose either to create a new flow or to update an existing flow. For this case, select creating a new flow.
- During the process, you have to configure the connections to the involved systems (Microsoft Outlook Calendar and Microsoft Outlook tasks). Just login with your Microsoft account which you’re using for these products/services.
Please keep in mind you need a work account, a premium account or a school account to currently perform the import action. If you „just“ have a regular (private) account, then you can build the flow step by step by having a look at my attached screenshot below.
Notice
The flow packages will be released soon. You can’t download them just yet.
Removing birthdays events
This flow runs every Sunday at 02:00 AM in the morning and removes every birthday event in your newly created birthday calendar. It’s a pretty straight forward flow as you can see in the following picture:
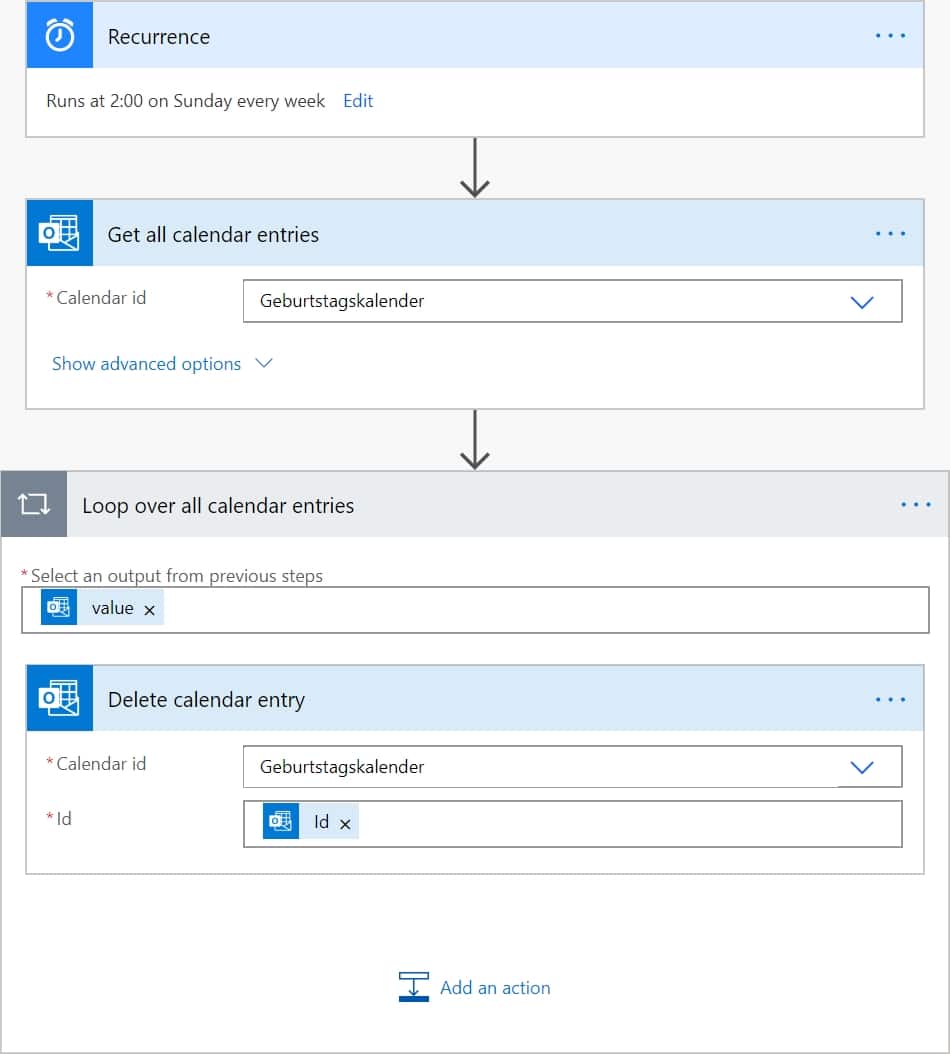
When configuring the flow, make sure that you’ve selected the correct calendar to delete your birthday events from.
Generating birthday events
This flow is a bit more complex compared to the first one and will run – depending on the amount of contacts in your Outlook.com or Office 365 account – for multiple minutes creating birthday events in your newly created birthday calendar. The flow runs every Sunday at 03:00 AM.
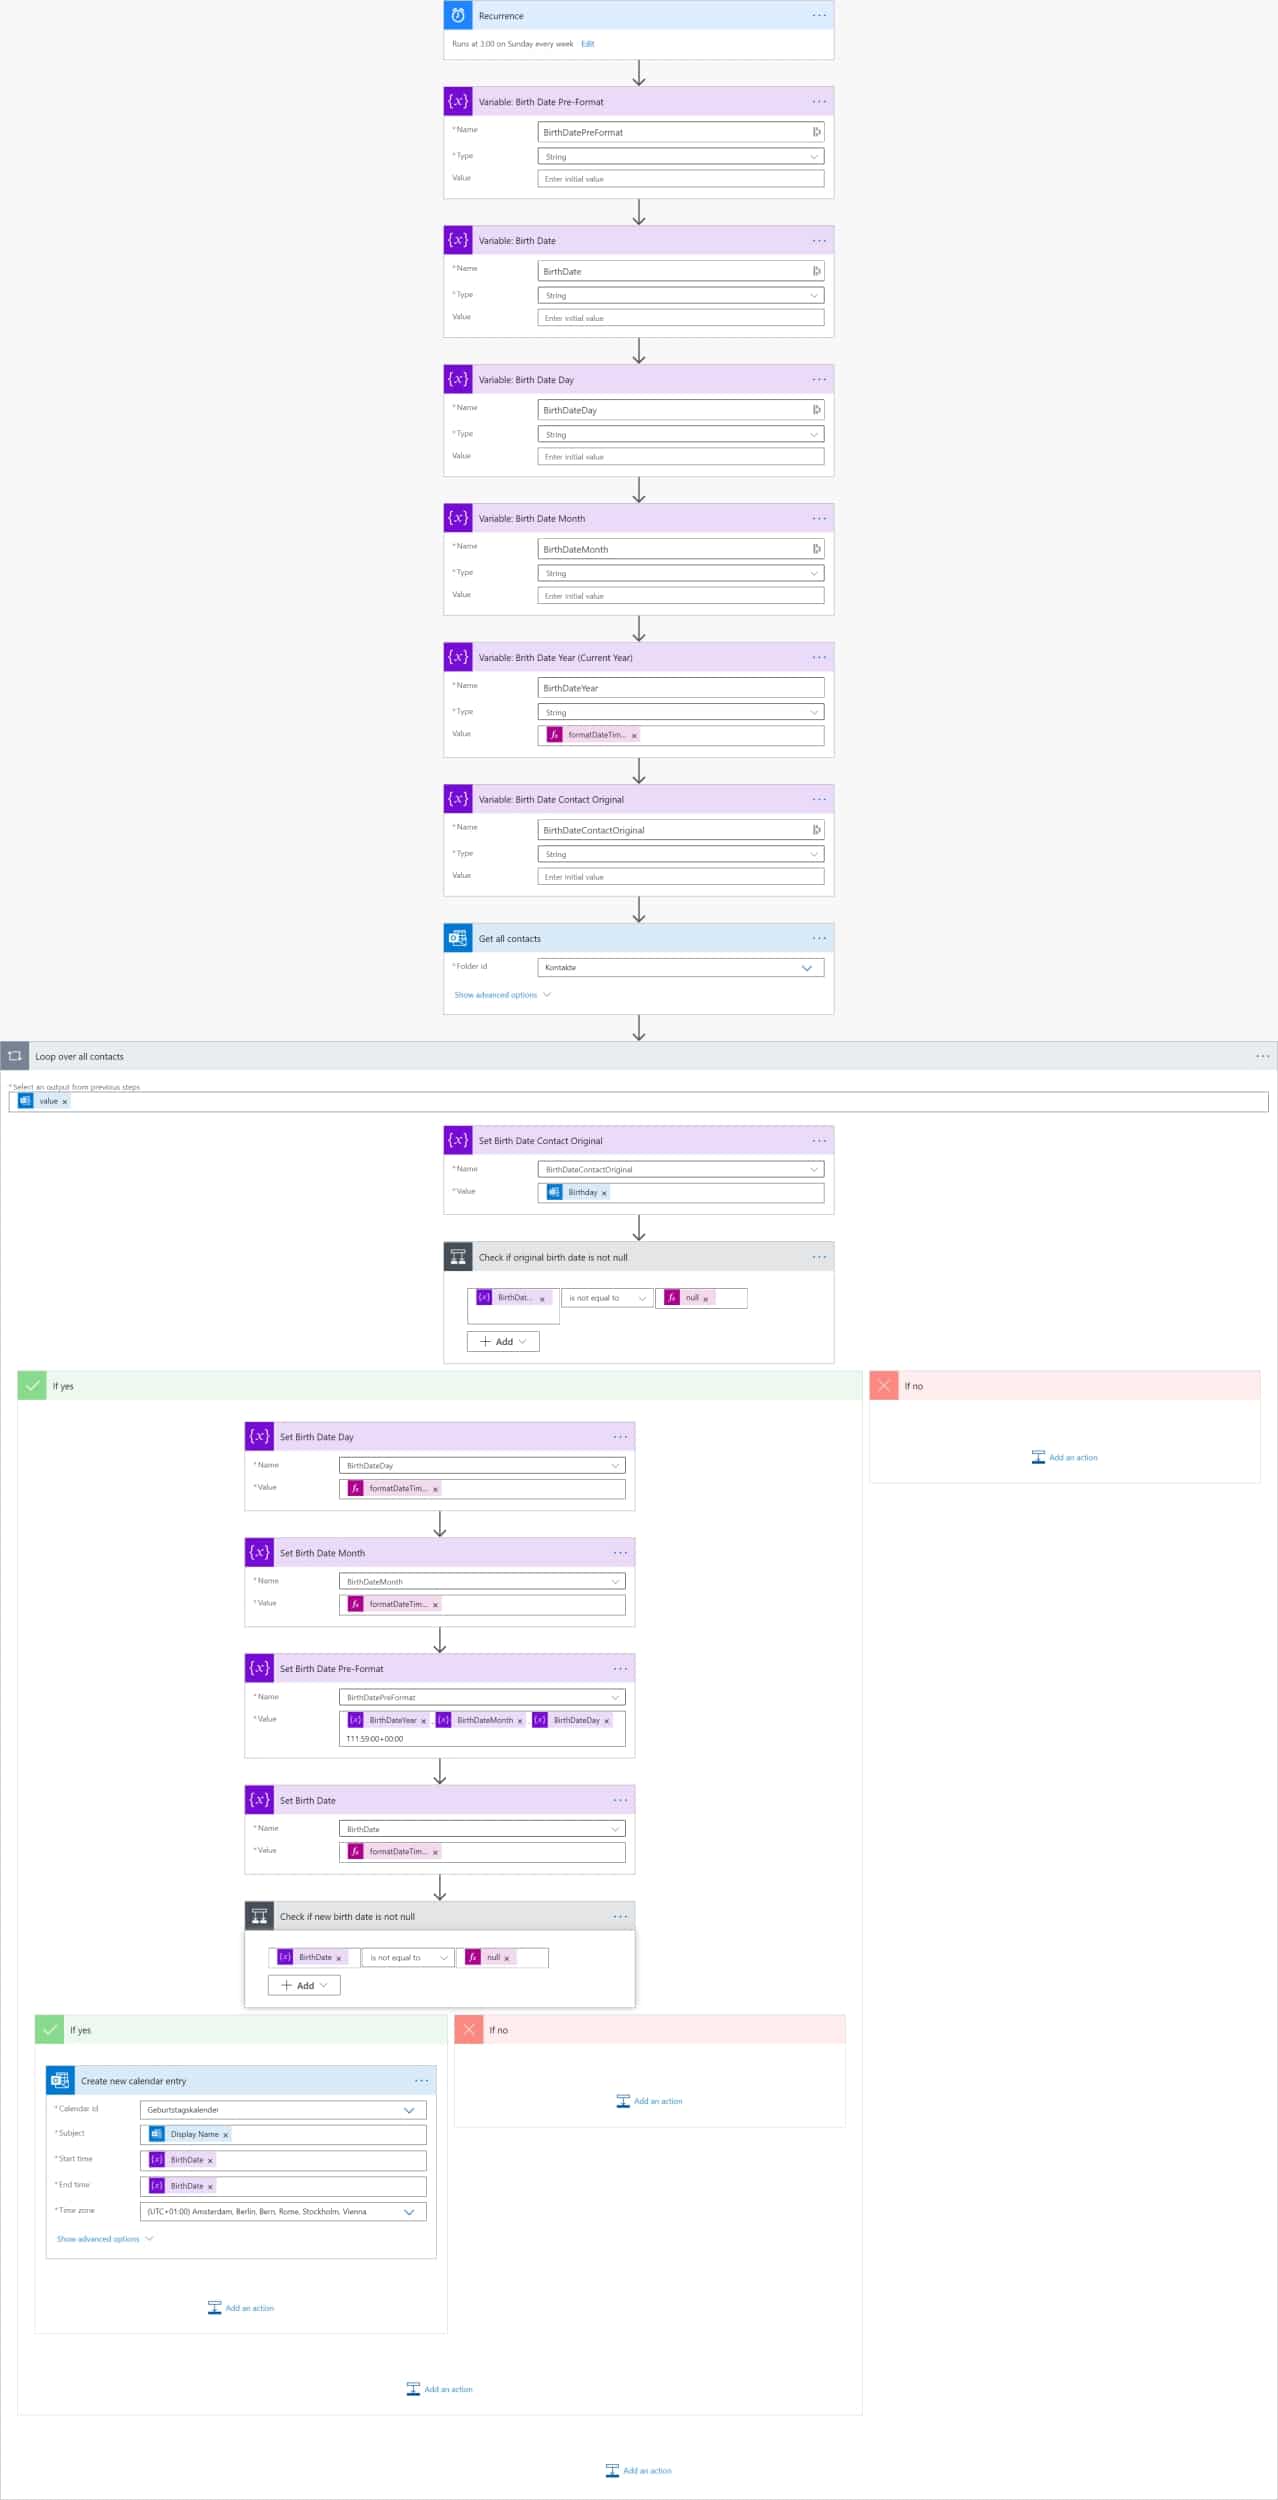
The flow starts with some variables for the birth date (which has to be converted to the current year for creating a correct birthday event) and some more general information.
As a next step, the flow loops over all contacts and sets the original birth date. If the birth date is valid (is not null), then it builds the correct date for the birthday event which covers the original day and the original month but the current year as that’s the relevant year for creating the birthday event in.
After some more checks, variables and magic, a new calendar entry will be saved to the newly created birthday calendar. with the following parameters:
- The display name is the name of the contact.
- The date is the day and month of the birth date combined with the current year.
- The calendar entry is a full-day event.
- The priority is set to high as birthdays are important to remember to keep good relationships.
- The text field contains the mobile phone number of the contact with a tel: extension to click on the phone number and directly call the contact.
There are possibilities to extend this flow. You may add the current age of the contact or the email address (note that there can me multiple email addresses per contact). Feel free to comment and share your ideas for inspiration.
Schreibe einen Kommentar